OpenClinica Lead Transfer to EDC (Study Hub)
Overview
If your study uses both Recruit and OpenClinica EDC, the lead transfer integration moves screened leads into the EDC without anyone re-entering their data. You can transfer one lead, transfer a batch at once, and resync later if their screening answers change.
Lead transfer is part of Study Hub — see "Study Hub Overview" for how recruitment, engagement, and data capture connect. If you're interested in enabling the integration, contact your Customer Success Associate (CSA).
What a transfer sends to the EDC
A single transfer does more than create a record. When you transfer a lead, Foundation:
- Creates the participant in your OpenClinica EDC study
- Transfers the lead's contact data to the participant record
- Maps their remaining screening form responses into the eCRF
- Registers the participant for eCOA and eConsent, if those add-ons are enabled in your EDC study
Registering for eCOA and eConsent at transfer is optional. Register right away if you want participants ready to consent or start reporting immediately, or skip it and register them later at the point in your EDC workflow where it fits.
Understanding the EDC PID column
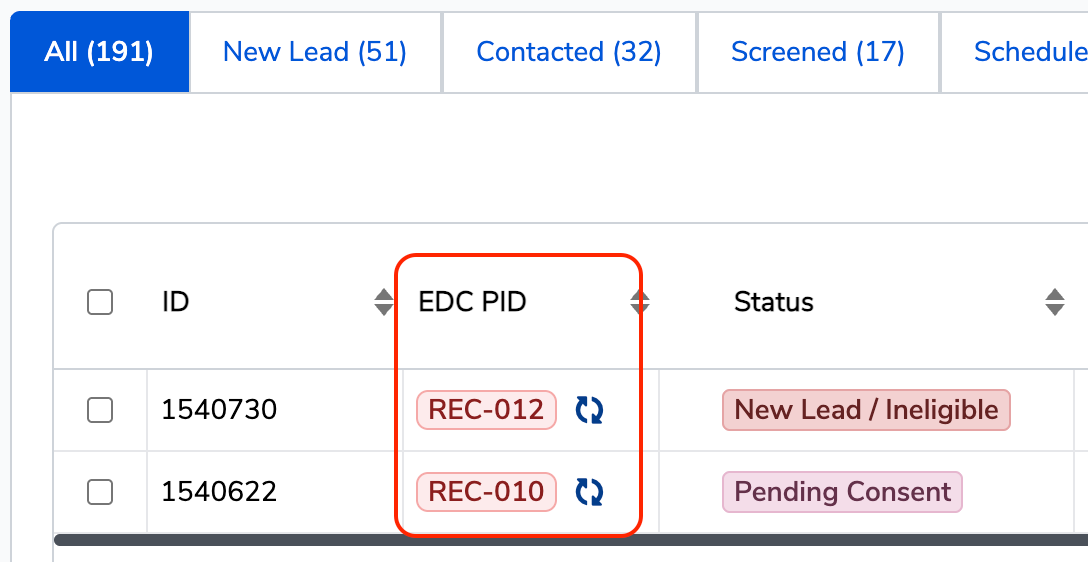
Transfers happen from the EDC PID column in your lead list. That column is also your status indicator:
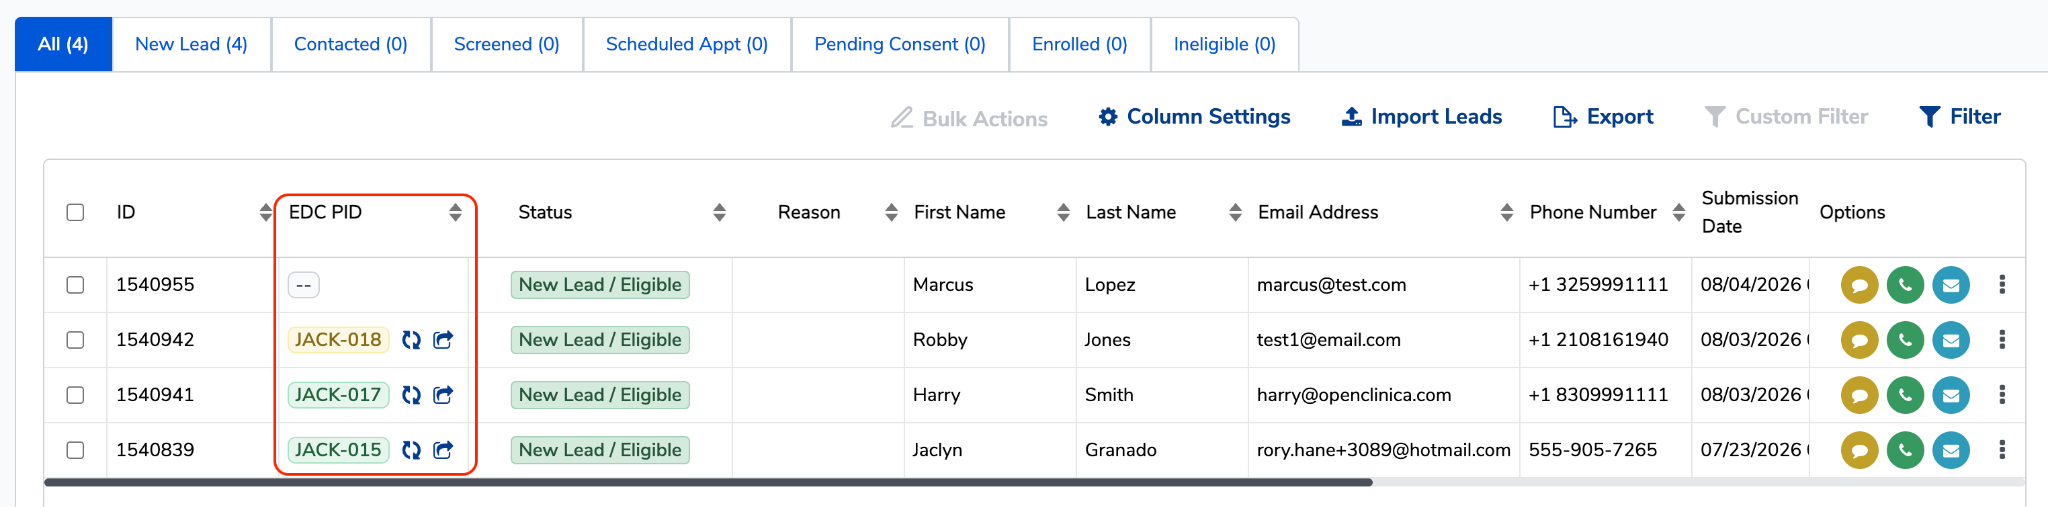
- A double dash (--) means the lead hasn't been transferred yet. Click it to start a transfer.
- An EDC participant ID means the transfer succeeded. Hover over the ID to see the transfer details.
- A yellow ID means the participant's screening data has changed since the transfer and needs to be sent again.
- Error means the transfer didn't complete.
Once a lead has transferred, an Open in EDC link appears next to their ID in the EDC PID column. Click it to jump straight to that participant's record in OpenClinica EDC — no need to search the Participant Matrix to find them.
How to transfer a single lead
- Click the cell in the EDC PID column for the lead you want to transfer.
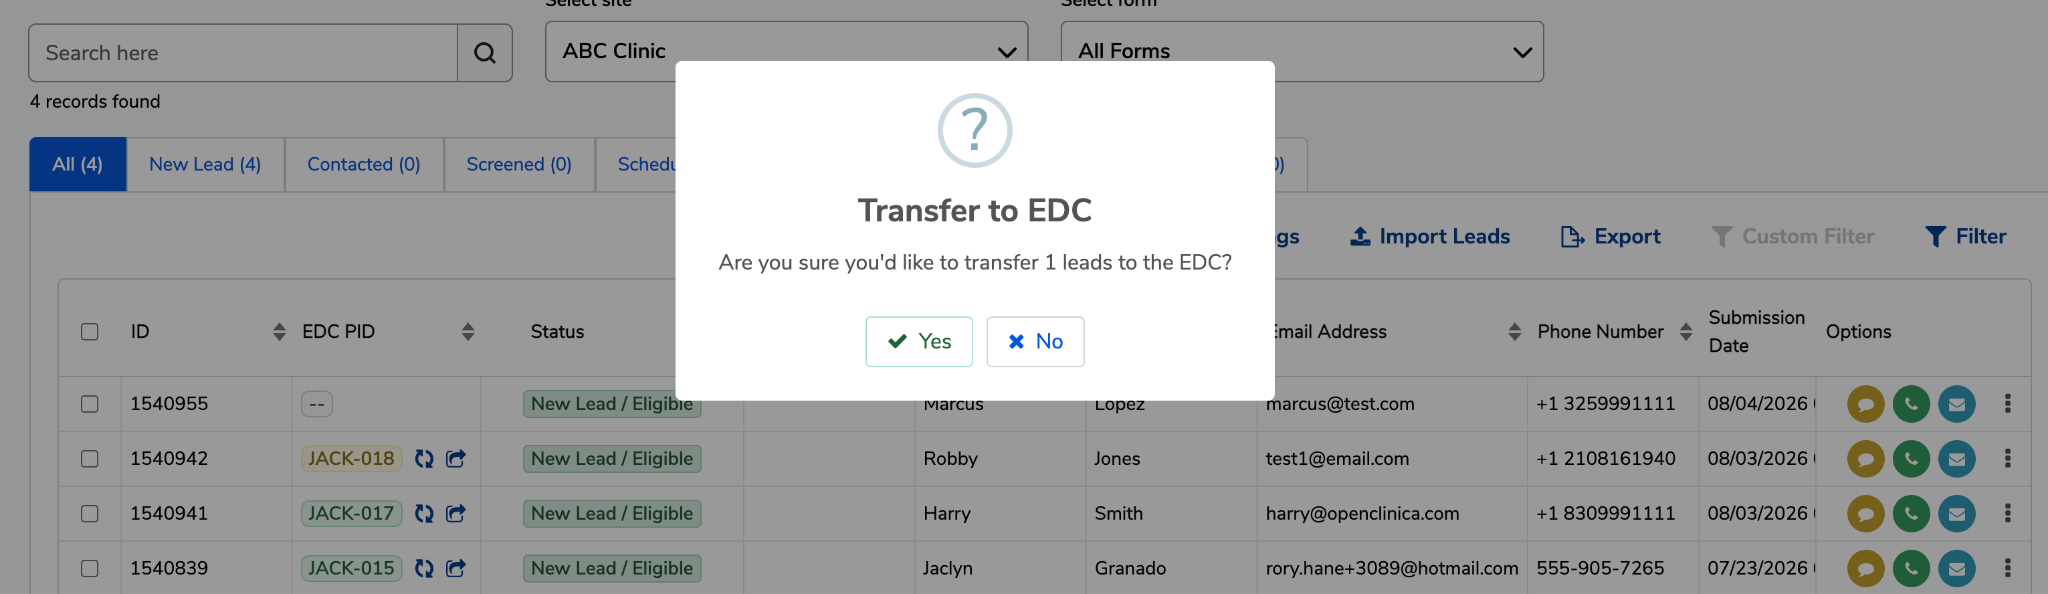
- Confirm the transfer when prompted. A message will tell you the transfer has been initiated.
- Check the EDC PID column for the participant's new ID. Hover over it to view transfer details.
- Click Open in EDC to open the participant's record in OpenClinica EDC and confirm everything came across.
How to transfer multiple leads at once
- Select the checkboxes next to each lead you want to transfer.
- Click Bulk Edit, then choose Transfer to EDC.
- Confirm the transfer when prompted.
- Check the EDC PID column for each new ID. Use Open in EDC to spot-check individual records, or log in to OpenClinica EDC and review the Participant Matrix to confirm the whole batch.
How to resync updated screening data
If a site user edits a screening form answer after a lead has already been transferred, you can push the update to the EDC.
- Look for yellow IDs in the EDC PID column.
- Click the cell and confirm the transfer when prompted.
- The updates go to the EDC and the changes are recorded in the EDC Audit Log.
Tip: An ID only turns yellow when there's actually something new to send, so treat it as a to-do rather than something to check manually.
How to track transfer status across your study
For a quick count of where every lead stands, use the EDC Lead Transfer dashboard above the lead list.
To work through a specific group, filter the lead list by EDC Lead Transfer Status:
- Successfully Transferred
- Not Transferred
- Needs Resync
- Errors

What to do if you see an Error
An Error status in the EDC PID column means the transfer didn't fully complete. Email support@buildclinical.com and our team will troubleshoot the connection issue with you.