
Foundation Study Settings - Email Templates
Overview
Email templates allow your team to create and save pre-written messages that can be sent to leads directly from Foundation. Instead of writing the same email from scratch each time, you can build a library of templates for the most common points in your recruitment workflow — such as initial outreach, automated nudges, or post-screening follow-ups.
Templates are managed from the Email Templates tab in your Study Settings.
Understanding email templates
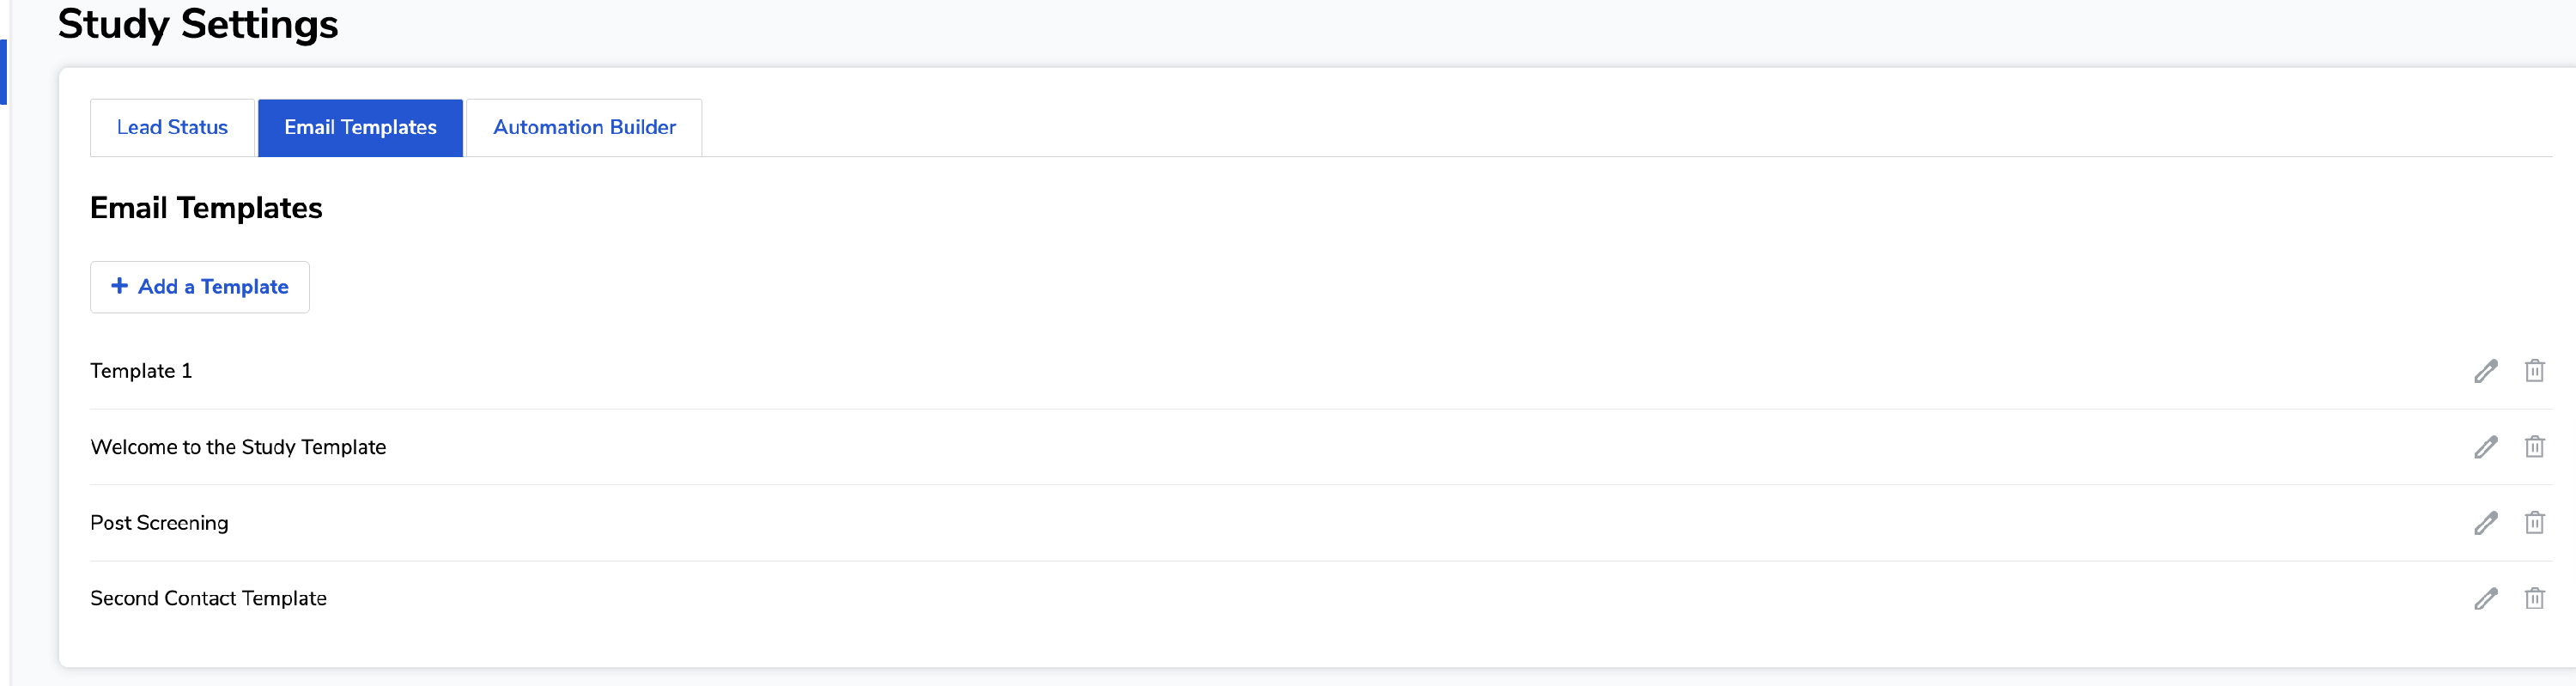
The Email Templates tab displays all saved templates for your study. From here you can add new templates, edit existing ones, or delete templates you no longer need. Templates are study-specific — they are only available within the study where they were created.
Adding a new template
- Navigate to your study in Foundation. From the My Studies page select the study you want to configure.
-
Open Study Settings and click the Email Templates tab.
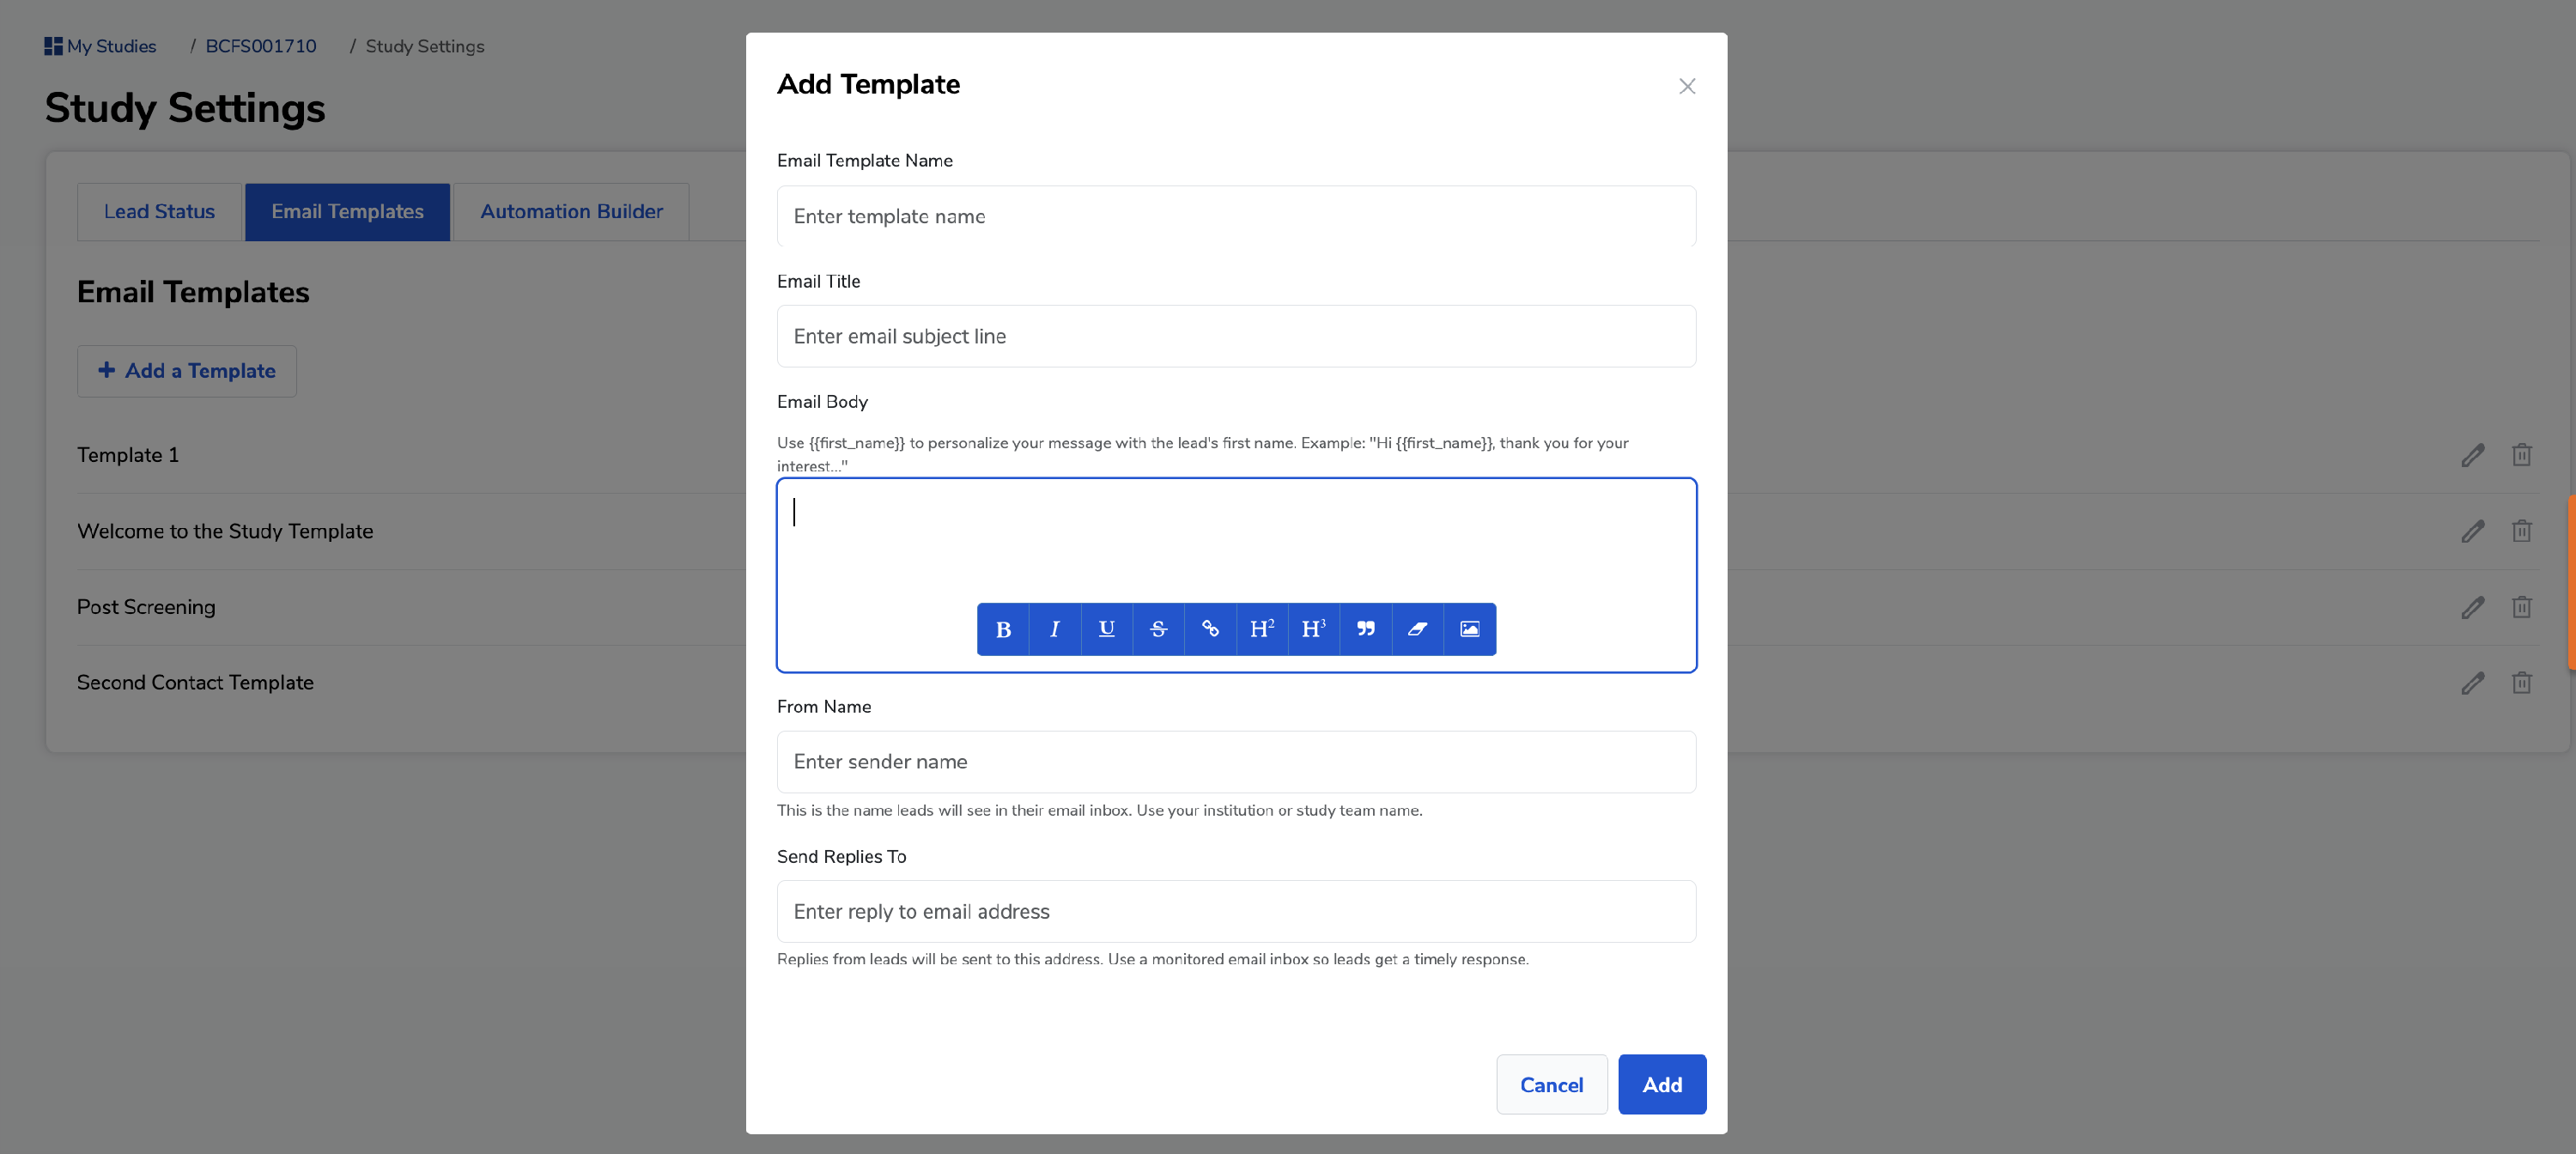
Click + Add a Template. This opens the template editor.
Give your template a name. Choose a name that makes it easy to identify at a glance — for example, "Welcome to the Study" or "Post Screening Follow-Up."
Write your email content.
Add a subject line and compose the body of your email using the built-in rich text editor. You can format your message with bold, italics, headers, and more. The editor also supports:
- Image uploads — add your clinic or study logo to keep emails on-brand
- Hyperlinks — link to an external scheduling page, patient portal, or any relevant URL to make it easy for leads to take the next step
- Configure the sending information:
- From name — the name leads will see as the sender (e.g., your site name or study team)
- Reply-to email — the email address that receives replies when a lead responds to the email
- Save the template. Click Save. Your template will now appear in the Email Templates list and will be available to use when contacting leads in this study.
💡 Tip: Name your templates after the workflow stage they correspond to — for example, "First Contact," "Scheduled Appt Confirmation," or "Post Screening." This makes it faster for your team to find the right one when reaching out to a lead.
Editing an existing template
- Open Study Settings and click the Email Templates tab.
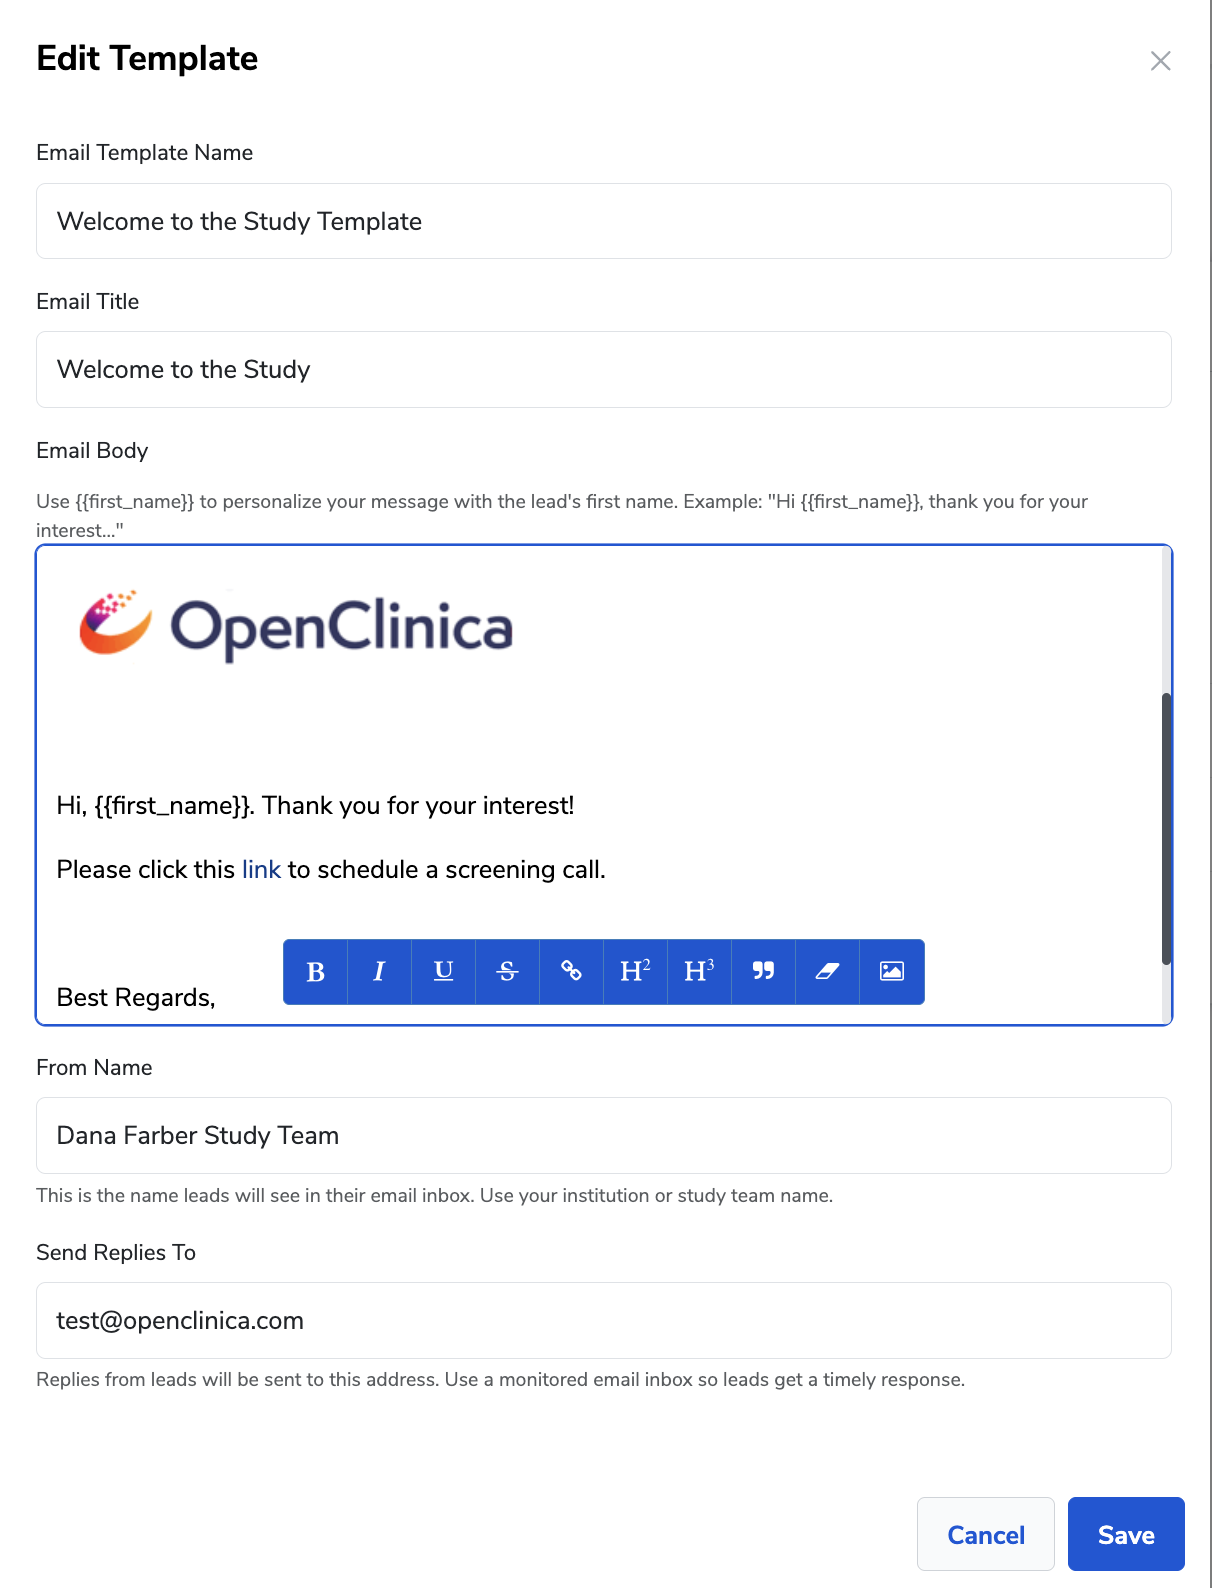
- Click the edit icon (pencil) to the right of the template you want to update.
- Make your changes to the name, subject line, or body.
- Click Save.
⚠️ Note: Editing a template does not affect any emails that were already sent using it. Changes only apply to future use.
Deleting a template
- Open Study Settings and click the Email Templates tab.
- Click the delete icon (trash) to the right of the template you want to remove.
- Confirm the deletion when prompted.
Common questions
Q: Can I use the same template across multiple studies? A: Templates are study-specific and cannot be shared directly between studies. You can recreate a template in another study by copying the content manually.
Q: Is there a limit to how many templates I can create? A: There is no set limit. We recommend keeping your template library focused and organized so your team can find the right message quickly.
Q: Where do I use these templates when contacting a lead? A: When sending an email to a lead from the Communication widget in Foundation, you'll have the option to select a saved template to pre-fill the message. Email templates will also be available for use in the Automation Builder.
Q: Can I include personalization in my templates, like the lead's name? A: You can use variables for the lead's first name to provide personalization.